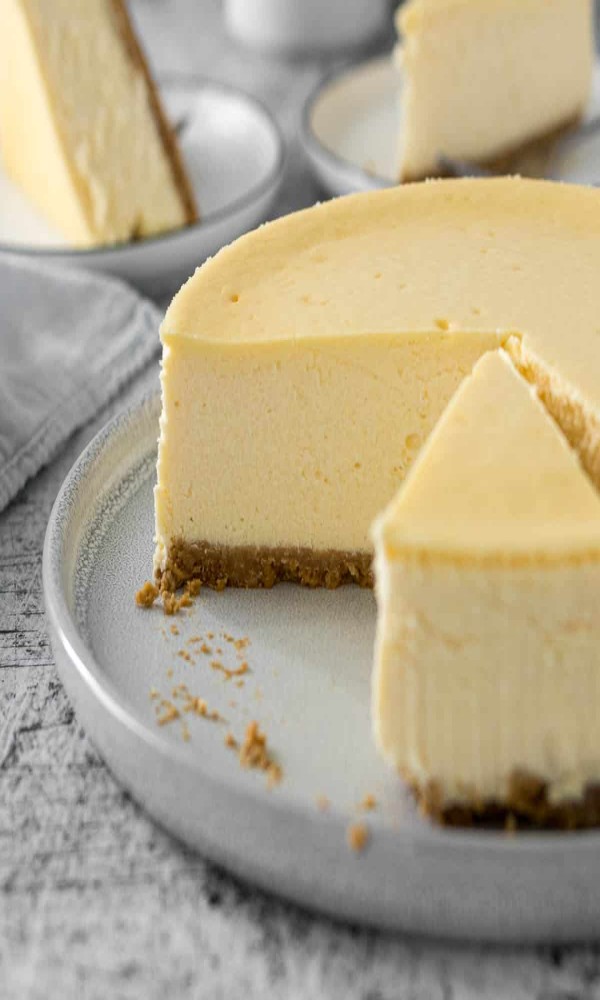
The Dreamiest Philadelphia Cheesecake Recipe You’ll Ever Make (Australian Style!)
Cheesecake: the creamy, dreamy dessert that seems like it should be complicated to make, but can actually be whipped up in your kitchen with minimal fuss. This recipe uses the magic of Philadelphia cream cheese to create a rich and decadent cheesecake that’s perfect for any occasion. Whether you’re serving it up for a special dessert or just need a little pick-me-up, this Philadelphia cheesecake recipe is sure to hit the spot.

And the best part? This recipe is designed specifically for our friends down under! We’ve included metric measurements for all the ingredients, and we’ve made sure to use ingredients that are readily available in Australian supermarkets. So, what are you waiting for? Let’s get baking!
Ingredients:
For the base:
200g Arnotts Shortbread biscuits (or your favourite biscuit base)
For the cheesecake filling:
600g Philadelphia cream cheese, softened
For the topping (optional):
Fresh berries
Directions:
1. Preheat your oven to 160°C (320°F). Grease a 23cm springform pan.
2. Make the base: Crush the biscuits into a fine crumb. You can do this by placing them in a food processor and pulsing until they resemble crumbs, or by putting them in a sealed bag and bashing them with a rolling pin.
3. In a medium bowl, combine the biscuit crumbs with the melted butter. Mix well until the crumbs are evenly coated.
4. Press the biscuit mixture firmly into the bottom of the prepared springform pan. Use the back of a spoon or your fingers to make sure the base is evenly compacted.
5. Bake the base: Bake the biscuit base in the preheated oven for 10 minutes. Remove from the oven and let cool slightly while you prepare the filling.
6. Make the cheesecake filling: In a large bowl of an electric mixer fitted with the paddle attachment, cream together the softened cream cheese and caster sugar on medium speed until light and fluffy. Scrape down the sides of the bowl as needed.
7. Add the eggs one at a time, beating well after each addition. Be sure to scrape down the sides of the bowl after each egg is incorporated.
8. Stir in the vanilla extract, sour cream, and lemon zest until just combined. Don’t overmix!
9. Pour the filling: Pour the cheesecake filling over the cooled biscuit base. Give the pan a few gentle taps on the bench to release any air bubbles.
10. Water bath: Wrap the outside of the springform pan tightly with a double layer of aluminium foil. Place the pan in a larger baking dish. Pour enough hot water into the baking dish to reach about halfway up the sides of the springform pan.
11. Bake the cheesecake: Bake the cheesecake for 1 hour and 10 minutes, or until the centre is just slightly set. The cheesecake will still be a bit wobbly in the centre, but it will firm up as it cools.
12. Turn off the oven and leave the cheesecake inside with the door slightly ajar for another hour. This will help prevent the cheesecake from cracking.
13. Once the cheesecake has cooled slightly, remove it from the water bath and refrigerate for at least 6 hours, or preferably overnight, before serving.
14. To serve: Run a warm knife around the edge of the cheesecake to loosen it from the pan. Carefully remove the springform pan. Slice the cheesecake and serve chilled, topped with fresh berries, whipped cream, chocolate ganache, or your favourite topping.
Nutrition Facts (per slice)
Calories: 450
Please note: These are just approximate nutrition facts and can vary depending on the specific ingredients you use.
Conclusion


